Tutorial

Code4Startup – Learn to code by cloning real startup projects

Code4Startups

From time to time you will be hearing advices that if a person wants to be good, first he/she needs to imitate, copy or learn from other good examples. Yup, this is actually a very practical example. You need to learn from others in order to discover and establish your own creation.

This applies to the world of coding too. And recently, I stumbled upon this learning website Code4Startup from Product Hunt that you can learn to code with front-end and back-end technologies by cloning popular real life startup projects.

Continue reading

It’s time to use Flexbox and here’s where to learn

Flexbox

After we said goodbye to the good old table layout, CSS float has been the go-to method when dealing with web layouts. By default, block elements are stacked from top to bottom, but with CSS float and some other useful properties, we designers are able to code the layout as according to our design. However CSS float has many shortcomings and until now there are still no easy way to achieve certain layout.

Perhaps one of the most frustrating thing is how to make a block centered horizontally and vertically. Well certainly there are many solutions to it as explained on CSS-Tricks, but there are still a lot of conditions to meet. But with the new CSS Flexbox, it will solve many problems and change the way to create layouts.

Continue reading

Creating a wave pattern of lines in Illustrator

Creating a wave pattern of lines in Illustrator

Few weeks back, a reader sends me a picture of this stock vectors and asking me whether I can show him how to achieve the result. Well, it’s a illustration depicting a wave of lines that comes in different thickness and shades of blue. I did some tryouts and find that it’s not that hard to achieve.

For this tutorial, I will show you how to create the wavy patterns of lines similar to the stock vector above by using Illustrator at least version CS5 or above. This is because you will need to use a tool call “Stroke Width” which only available in mentioned version. Continue read on to find out more!

Continue reading

Quick tip: Use a CDN to host your favorite scripts

Quick tip: Use a CDN to host your favorite scripts

When building website, most probably you will be using Javascript frameworks like jQuery or Mootools to enhance your website. Obviously you will grab a copy of the library from their homepage and link it in your web pages, then upload together to your web space. Well, why not using CDN to host your favorite script?

I found three content delivery networks (CDN) that host some of the most commonly used scripts in the world: Google Libraries API, Microsoft Ajax CDN and CDNJS. Google Libraries is the popular one, but hosts lesser scripts compared to CDNJS. The latter hosted a really huge amount of scripts including Modernizr and many more. And why we should use CDN instead of hosting on our own?

Continue reading

Create cool animated menu on hover with CSS3 background-size

Create cool animated menu on hover with CSS3 background-size

With CSS3’s transition property, Web Designers are able to do object transitions, especially for interactive content like navigation menus, without relying on Javascript. In this tutorial, I’m going to show you how you can achieve cool animated menu on hover by using CSS3.

For this tutorial, we will be utilising CSS3’s background-size property as well as transition property, to animate the background image. If you are learning CSS3 and would like to learn this trick, please continue reading to find out how.

Continue reading

Creating wireframe text effect with Illustrator

Creating wireframe text effect with illustrator

3D tool in Illustrator has been existed for some time and it is very useful to create simple 3D models and text effects easily. In this tutorial, I will show you how you can utilise the 3D’s wireframe option to create a unique yet eye catchy text effect.

What you need here is an Adobe Illustrator version that comes with 3D tools. This tutorial is really easy to do and it’s really suitable for beginners who wants to learn more about Illustrator. Please continue reading to follow the step by step tutorial!

Continue reading

Simple smart sticky navigation bar with jQuery

Simple Smart Sticky Navigation bar with jQuery

It’s been a while since I posted tutorial article. In this post, I will show you how to create a smart sticky navigation bar easily with just few lines of Javascript codes, powered by the mighty jQuery.

Smart sticky navigation bar is a bar that sits at its original place above the fold, but when you start scrolling down the long page, it will sticks at the top of the browser window and follows, similar to IGN’s corporate website’s navigation bar. Continue reading out the demo and the codes after the break.

Continue reading

Creating stylish business logo with techie background

Creating stylish business logo with techie background

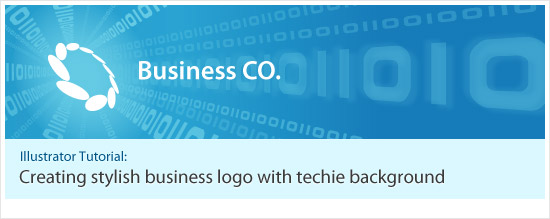
Today we are going to learn how to create a stylish business logo with techie background in Adobe Illustrator. This tutorial was actually a request by a reader early this month, but so sorry that it take so long until now I only manage to write this tutorial and post it up.

As mentioned earlier, the final outcome of this tutorial which shown above, was done by Adobe Illustrator, thanks to its powerful tools and filters. Well to do this tutorial, you need at least CS version or above, and have basic knowledge with it too. I will separate this tutorial into two part: First part is the creation of the logo while the second part is the background.

Part 1: Stylish Business Logo

Step 1: Well from the sample picture I had from the reader, the logo was created by a series of oval shapes that formed into a circle. So by using Ellipse Tool, create an oval shape, then rotate it about 20 degrees. Apply any color as you like but in this tutorial, I use #5BC1E5.

Step 2: Then we need to create some guidelines for the oval to travel in circle precisely. First, we create a circle and one vertical line and one horizontal line. Select three of them, open up Align Palette and hit Horizontal Align Center and Vertical Align Center. This step is to find out the center rotate point for the oval shape.

Step 3: To make things easier, please enable Smart Guides (Ctrl+U). Then, we place the blue oval shape on top of the circle, with the center point of oval touching the crossing point of the circle guide and vertical line.

Tip: You can use outline view (Ctrl+Y) and zoom in further for more precise result

Step 1, 2, 3

Step 4: Now we will duplicate and rotate the oval to form the business logo. First, select the blue oval and then select Rotate Tool at the Toolbar. With the help from Smart Guides and guidelines created just now, move your mouse to locate the center point of the guidelines, shown in picture below.

Step 5: As soon you found the center point, press Alt while hitting left mouse button. The rotate point of the blue oval shape has just set by you. A Rotate window should pop up. According to the sample picture, the logo consists of 10 ovals, so we need to rotate 9 times with angle 36 degrees. So in the Angle field, enter 36 and select Copy. A new oval is duplicated. Then duplicate the process again by hitting Ctrl+D 8 times. You should have the similar final result as picture below.

Step 4, 5

Step 6: Now we need to 3D rotate it. Remove the guidelines and select all and group the ovals, then open up the 3D Rotate Tool. Enter the numbers like picture below and click ok.

Step 7: Once satisfy with the 3D rotation, expand it (Object > Expand Appearance). Because the current logo is all stick together, so we have to divide them by using Pathfinder’s Divide Tool. After Divide, delete the unwanted shapes that does not belongs to the logo.

Step 8: Now we will make the final tweaking to the logo: to make them slightly smaller so that to have a little more gap between them. To achieve this, we use Offset Path (Object > Path > Offset Path). Enter Offset number -0.5px and hit OK. A new smaller ovals are created now.

Step 6, 7, 8

Logo Finished: Now the stylish business logo has finally created! Well you can accompany it with modern style Sans Serif fonts as logo type. In here, I use Myriad Pro.

Logo Finished

Part 2: Techie Background

Step 9: Now it’s time to create the techie background. Create a rectangular shape behind the business logo which I colored it to white now with gradient color shown in picture below.

Step 9

Step 10: We need to create a text line consists of character “I” and “0”. I found a font that looks sinilar to the sample picture which called Earth. By using this font, type out the text line, don’t type it too short. Once done, create Outline (Ctrl+O) the text and launch 3D Rotate Options again, and entering the values like picture shown below.

Step 11: Duplicate the 3D-fied number line and edit the 3D options to create a second version of it. All the values remain unchanged, but change the Perspective value from 160 to 90.

Step 12: Expand Appearance both of them and repeat Step 7 to both.

Step 10, 11, 12

Step 13: Like the sample picture, we place the number lines, giving an illusion of the numbers are coming out from the logo. Color the lines #66c9E3 with verious transparency level, around 30% to 70%. Basically just not too strong until distract the logo.

Step 13

Step 14 & 15: Now we need to create a glow behind the logo. To do this, first create an oval shape, then Feather it with Racius of 25px. Click ok once done. You can adjust the size of the oval to make it a bigger glow. Make sure it fully glows over the logo.

Step 14, 15

Step 16: We are getting close to final! Well, now by refering to the sample pic, there is one line that is slightly blurred. To do this, we duplicate the number line twice and place one on top and one at bottom of the original like picture below.

Step 17: Once done, apply Gaussian Blur (Effect > Blur > Gaussian Blur) to both of them, with value of 5.0. Click OK to finish.

Step 16, 17

Final step: Finally, mask all the numbers and glow that exceeding the background rectangular. And now the tutorial has finally comes to the end! Let’s compare the Stylish Business Logo with Techie Background that created just now with the sample picture. Although it does not look close to it but hey, at least we knew how they done it! Basically this is it, hope you enjoy this lengthy tutorial! 😀

Final result

Create simple light stripes effect in Photoshop

Create simple light stripes effect in Photoshop

Today I’m going to teach you a simple tutorial on creating a simple light stripes effect in Photoshop. The tutorial is simple and I think it’s suitable for Photoshop beginners too. Before getting into the steps, please take a look at the final result below. This light stripes effect looks cool in both dark and bright, hot and cold background too, so I think it’s a really cool and useful effect.

Besides that, you can also learn how you can add magic to your graphic designs with Photoshop.

Continue reading

Creating Omspace 3D cylinder graphic in Illustrator

Creating Omspace 3D cylinder graphic in Illustrator

When entering Omspace, a weblog of Kenny Ren, immediately I was attracted by the huge and interesting 3D graphic header. Then, I wonder how to create the 3D Cylinder looking graphic in Illustrator. Well, actually it’s quite simple to achieve and I have plenty of fun too in the process.

To do this tutorial, Adobe Illustrator CS or above is a must, because we need to use the 3D function and if I’m not mistaken only Illustrator version from CS and above support it. Before preceed, please take a look at the preview below on what we are going to do and learn. Besides 3D, we will touch on creating graphic symbols as well as the 3D Map Art function.

01

Symbol 1: Top Surface

First, start off by creating the Top Surface graphic symbol. By using the Ellipse Tool, draw out a perfect circle (press Shift while dragging). Then go to Object > Transform > Scale to open up the Scale windows option. Scale the circle by 80% Uniform and click “Copy”. A new smaller circle is created. Then duplicate it (Crtl-D) several times until you have a total of 6 circles.

After that, by referencing Omspace 3D cylinder, scale and move each of the circle to look as closer as Omspace’s. After that, color each circle with color code shown in the picture below.

02

Looking back at the Omspace 3D cylinder again, there is a white “shine” on the 2nd smallest circle which we are going to create it now. By using the Rectangular Tool, draw out a small rectangular. Then expand the bottom width of the rectangular evenly to left and right.

Place the rectangular on top of the 2nd circle, below the 1st circle. Duplicate the 2nd circle and select it with the rectangular and hit “Divide” on the Pathfinder Palette (Actually, you can use “Intersect” for faster result). Then, ungroup it and delete the unwanted part. Then color the “shine” with white color.

03

Symbol 2: Cylinder Body

The “Top Surface” is finished! Now proceed to “Cylinder Body”. First, select the Rectangular Grid Tool, click on the canvas once to toggle the tool options. Then fill in the options like example shown below. Click “OK” to finish.

04

Ungroup the Rectangular Grid created just now and “Divide” it using the Pathfinder palette. Ungroup it again. Now the grid should become 3 individual rectangulars that placed side by side from top to bottom. Then, color each of the rectangular with color code shown below.

05

Drag “Top Surface” & “Cylinder Body” to Symbols Palette

Finally, two symbols are done. Now, drag them into the Symbols palette. Name them “Top Surface” and “Cylinder Body” respectively. Ok, now the part 1 of the tutorial is now completed. Next, we are going to make the 3D cylinder and map the 2 symbol graphics to it!

06

Creating 3D cylinder and “Map Art”

You can save the document, hide the graphics that created just now and create a new layer to continue. Now, create a circle again with fill gray color only. By selecting the circle created just now, go to Effects > 3D > and select “Extrude & Bevel…”. Fill in the options shown in picture below. After this, click on the “Map Art” button to open up the Map Art window.

07

We are going to map the 2 graphic symbols to this 3D cylinder. In the Surface 1, map it with “Top Surface” symbol. Remember to click “Scale to Fit” and tick “Invisible Geometry”. Skip the Surface 2 and proceed with Surface 3. Map the Surface 3 with “Cylinder Body”. Click the “Scale to Fit” too. Well, you can tick Preview to see the transformation of the 3D cylinder.

08

From the boring gray circle, it becomes an interesting 3D cylinder graphic! I think it looks really close to what’s on Omspace. Well, it’s not finish yet. Duplicate the 3D cylinder to the side as backup. Then select it and click “Expand Appearance” at Object menu. Ungroup it for several times until the Top Surface and Cylinder Body separates.

In this final step, create a rounder rectangular with black fill color and place it at right part of the cylinder. Adjust its transparency to 15% and move it below the Top Surface.

09

Finally finish! Looks how beauty and cute it is. The 3D and Map Art function are really useful and fun to use. You can use it to create many other cool and interesting 3D graphics with different graphic symbols, extrude thickness and many other shapes. Possibility is endless here.

10

End Note
Basically this is the end of this tutorial. Hope you find it useful and have fun experimenting with it. 😀 And another thing, I almost exceed the bandwidth allowed last month, so from now on I will host the pictures with Photobucket.