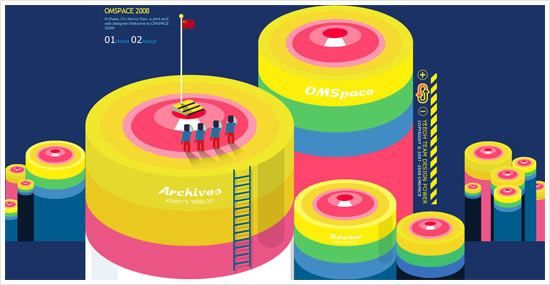
When entering Omspace, a weblog of Kenny Ren, immediately I was attracted by the huge and interesting 3D graphic header. Then, I wonder how to create the 3D Cylinder looking graphic in Illustrator. Well, actually it’s quite simple to achieve and I have plenty of fun too in the process.
To do this tutorial, Adobe Illustrator CS or above is a must, because we need to use the 3D function and if I’m not mistaken only Illustrator version from CS and above support it. Before preceed, please take a look at the preview below on what we are going to do and learn. Besides 3D, we will touch on creating graphic symbols as well as the 3D Map Art function.

Symbol 1: Top Surface
First, start off by creating the Top Surface graphic symbol. By using the Ellipse Tool, draw out a perfect circle (press Shift while dragging). Then go to Object > Transform > Scale to open up the Scale windows option. Scale the circle by 80% Uniform and click “Copy”. A new smaller circle is created. Then duplicate it (Crtl-D) several times until you have a total of 6 circles.
After that, by referencing Omspace 3D cylinder, scale and move each of the circle to look as closer as Omspace’s. After that, color each circle with color code shown in the picture below.

Looking back at the Omspace 3D cylinder again, there is a white “shine” on the 2nd smallest circle which we are going to create it now. By using the Rectangular Tool, draw out a small rectangular. Then expand the bottom width of the rectangular evenly to left and right.
Place the rectangular on top of the 2nd circle, below the 1st circle. Duplicate the 2nd circle and select it with the rectangular and hit “Divide” on the Pathfinder Palette (Actually, you can use “Intersect” for faster result). Then, ungroup it and delete the unwanted part. Then color the “shine” with white color.

Symbol 2: Cylinder Body
The “Top Surface” is finished! Now proceed to “Cylinder Body”. First, select the Rectangular Grid Tool, click on the canvas once to toggle the tool options. Then fill in the options like example shown below. Click “OK” to finish.

Ungroup the Rectangular Grid created just now and “Divide” it using the Pathfinder palette. Ungroup it again. Now the grid should become 3 individual rectangulars that placed side by side from top to bottom. Then, color each of the rectangular with color code shown below.

Drag “Top Surface” & “Cylinder Body” to Symbols Palette
Finally, two symbols are done. Now, drag them into the Symbols palette. Name them “Top Surface” and “Cylinder Body” respectively. Ok, now the part 1 of the tutorial is now completed. Next, we are going to make the 3D cylinder and map the 2 symbol graphics to it!

Creating 3D cylinder and “Map Art”
You can save the document, hide the graphics that created just now and create a new layer to continue. Now, create a circle again with fill gray color only. By selecting the circle created just now, go to Effects > 3D > and select “Extrude & Bevel…”. Fill in the options shown in picture below. After this, click on the “Map Art” button to open up the Map Art window.

We are going to map the 2 graphic symbols to this 3D cylinder. In the Surface 1, map it with “Top Surface” symbol. Remember to click “Scale to Fit” and tick “Invisible Geometry”. Skip the Surface 2 and proceed with Surface 3. Map the Surface 3 with “Cylinder Body”. Click the “Scale to Fit” too. Well, you can tick Preview to see the transformation of the 3D cylinder.

From the boring gray circle, it becomes an interesting 3D cylinder graphic! I think it looks really close to what’s on Omspace. Well, it’s not finish yet. Duplicate the 3D cylinder to the side as backup. Then select it and click “Expand Appearance” at Object menu. Ungroup it for several times until the Top Surface and Cylinder Body separates.
In this final step, create a rounder rectangular with black fill color and place it at right part of the cylinder. Adjust its transparency to 15% and move it below the Top Surface.

Finally finish! Looks how beauty and cute it is. The 3D and Map Art function are really useful and fun to use. You can use it to create many other cool and interesting 3D graphics with different graphic symbols, extrude thickness and many other shapes. Possibility is endless here.

End Note
Basically this is the end of this tutorial. Hope you find it useful and have fun experimenting with it. 😀 And another thing, I almost exceed the bandwidth allowed last month, so from now on I will host the pictures with Photobucket.