One great tool that Adobe Illustrator offered to us is the Blend Tool. It is a tool to blend two objects with different shapes or color properties. It looks like a transformation from a shape to another. It is very fun to use and actually quite powerful and flexible too.
To establish a blend is very easy. Just create two shapes and select both of them, select Object > Blend > and click Make (or hit Alt-Ctrl-B). You now should see both shapes was tied together with a spline and blending steps in between. This is how blend tool works. Well, there is more stuff to explore with blend tool. Just continue reading to find out more!
Editing the blending spline

The blending spline can be edited easily with Pen Tool and Direct Selection Tool (white arrow) illustrated above. By selecting the spline, you can use Pen Tool to add more points, and use the white arrow tool to edit the direction of the line. It is just like editing a normal line shape.
Replacing the spline with other shape

The blending spline can be replaced with other shapes too. For instance the example shown above, by selecting the original blend result with a newly created spline (in this case is the round shape), now select Object > Blend > Replace Spline. The original spline was replaced by the round shape.
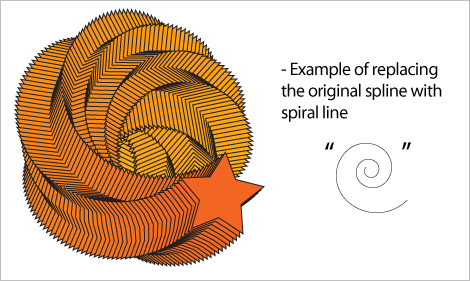
This is actually pretty cool function. You can replace with any other more funky shapes for example below is replacing the original spline with spiral line.

Make it longer and longer!

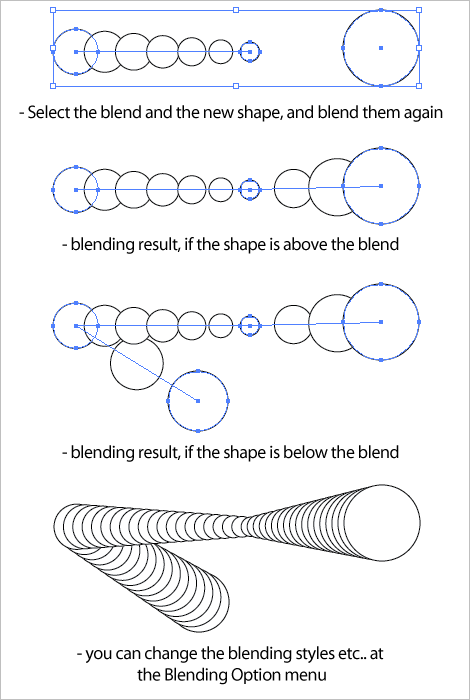
Another cool function I discovered just now is that you can make it longer and longer! If you have the original blend result, by selecting it with another shape and select Object > Blend > Make, the shape will continue the blending from the original created blend. If the shape is above blend, it will continue from the original upper blend end. However, if the shape is below the blend, it will connect from the original lower blend end.
Besides, you can also use Reverse Spline and Reverse Front to Back to edit the blending result, as well as using Blending Options.. to find more blending options, for example blending by smooth color, specified steps or specified distance and blending orientation. You can find it all under the Blend menu. Have fun blending!
Extra reading
Fun with Illustrator’s Blend Tool – Bittbox
Creating transitions with blends in Illustrator CS2 – Adobe Design Center
Stylish Vector Flower – N.design Studio